Friday, January 24, 2025

MOTI Play Pod Mod – Full Review


Hey guys, Old Goat here. Today, we’re taking a look at the MOTI Play Pod Mod—a little device I stumbled upon at Comic-Con Africa, thanks to Darth Vapor Corp. I was on the lookout for something new, and this one caught my eye. Slim, compact, and packed with features—it had my attention from the start.

But the real question is: Is it the Greatest Of All Time, or just another pod lost in the herd? Let’s dive in.


First Impressions: Small but Mighty

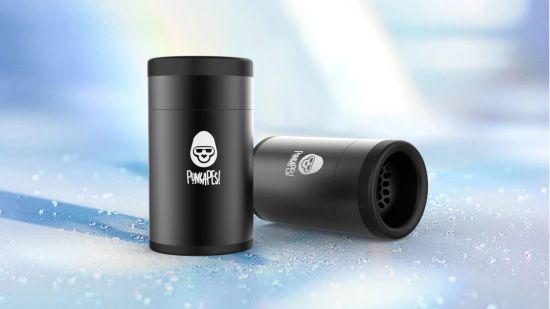
Right out of the box, the MOTI Play stands out. It’s thin, lightweight, and about the size of a credit card—perfect for slipping into a pocket. At just 12.5mm thick, it feels sleek in the hand, and despite its size, it’s got some serious metal and PC build quality that gives it a premium feel.          


I went with the black version, but there are plenty of colour options to match your style. It also features a 0.96” screen, which is impressive for a device this small. You can see your wattage, voltage, puff count, and battery life at a glance, which is a nice touch.

First thoughts? It looks good, feels good, and has all the makings of a solid stealthy vape. But does it perform?


Performance: Flavour That Packs a Punch

For something this compact, the MOTI Play brings some serious flavour to the table. It comes with a 0.45Ω mesh coil, and let me tell you—this thing slaps. The flavour is clean, crisp, and surprisingly strong for a pod mod. The coil design, combined with their new-gen cotton tech, really brings out the nuances in your e-liquid.

And let’s talk customization—this thing has a 360° airflow control knob that lets you switch between MTL (mouth-to-lung) and DTL (direct-to-lung) vaping. It’s rare to see that level of control in a pod device, and it actually works! Dial it down for a tight MTL pull or open it up for a restricted lung hit.


Another huge plus? The 510 drip tip compatibility. This means you can swap out the stock mouthpiece and use your own. It’s a small thing, but for vapers who like customizing their setups, it’s a welcome addition.

Now, I ran my usual coil tests on this. Pushed the 0.45Ω mesh coil to its 30W max, and while it handled it well, I found 25-28W to be the sweet spot. Longevity was decent—got about a week of solid use before noticing a drop in performance. Would have loved to test the 1.0Ω MTL coil as well, but… well, more on that later.


Battery Life & Charging: All-Day Power

The 900mAh battery is solid for a device this size. I was getting a full day of use at moderate wattages without needing to recharge. When it does run low, USB Type-C charging ensures you’re back up and running quickly.

It also features adaptive power control, adjusting output 20,000 times per second for a consistent experience. While that sounds like a lot of fancy marketing, it does seem to deliver a smooth vape without major power fluctuations.


What I Don’t Like: The Lanyard Dilemma & Coil Availability

Now, let’s talk about the downsides—because no device is perfect.

First off, the lanyard. I get it—some people love them. But personally? I’m not a fan. It just dangles around, gets in the way, and collects dirt… kind of like a goat’s beard after a long day in the fields. Instead of a lanyard, I would have much preferred an extra coil or, better yet, an extra pod.

And speaking of coils, there’s no spare coil in the box. That’s a let-down. At this price point, an extra coil should be standard. If the included coil burns out or you want to try the 1.0Ω MTL option, you have to buy extras separately.

That wouldn’t be such a big deal… if the coils were easy to find. But in South Africa, getting your hands on MOTI products is about as easy as herding cats—or in my case, wrangling stubborn goats. Availability is scarce, which is a major downside if you’re planning to make this your daily driver.


PROS & CONS

Pros:

Slim and pocket-friendly – stealth vaping at its best
Great flavour – the 0.45Ω mesh coil delivers
Adjustable airflow – full control over MTL and DTL experience
510 drip-tip compatibility – customize your vape
Solid battery life (900mAh) – lasts all day
Fast USB-C charging – quick and easy
Bright, easy-to-read screen – all your stats at a glance

Cons:

Lanyard included instead of a spare coil or pod
No spare coil in the box – should be standard
Coils are hard to find locally – limited availability
Slightly pricey for a relatively unknown brand


Is It Worth It?

Let’s be real—MOTI isn’t as well-known as Vaporesso or GeekVape. But after testing this little device, it absolutely deserves more attention.

The MOTI Play Pod Mod is compact, powerful, and packed with useful features. The flavour is on point, the airflow adjustment is smooth, and the 510 drip tip compatibility is a game-changer for a pod system. It’s not perfect—the missing spare coil and the lanyard choice are questionable—but overall, this device delivers where it matters.

However, availability is a real concern. If you can’t get replacement coils easily, that’s a deal-breaker for a lot of vapers. Hopefully, MOTI sorts this out because otherwise, this could have been a real dark horse—or should I say, a dark goat—in the pod mod market.

Big thanks to Darth Vapor Corp for pointing me in the right direction.


Final Rating: 6/10

A solid pod mod that stands out in a crowded market. It’s got great flavour, adjustable airflow, and customization options that most pod systems just don’t have. If MOTI threw in a spare coil and made their products easier to find, this could easily be a 7/10 device.

Still, it’s earned its spot in my rotation. Definitely a keeper—just make sure you can actually get the coils before committing.

Thursday, January 23, 2025

Dead Rabbit 3 RTA Review – Hopping Towards Greatness?

 Let’s talk about the Dead Rabbit 3 RTA, a tank with a name that promises to hop ahead of the competition. I paired this little beast with my trusty Target 200 mod and spent some time putting it through its paces. Is it the G.O.A.T. or just another bunny in the herd? Let’s break it down.


Design and Build Quality

Straight out of the box, the Dead Rabbit 3 RTA impresses with its clean, sleek design. The stainless steel build feels solid—like it could take a few tumbles and come out baa-ck for more. At 25mm, it sits perfectly on my Target 200, offering a seamless look without any overhang.

The top-fill system is simple and leak-resistant, which is always a win. No mess, no fuss—just pop the cap and fill. But while the design is sturdy, it doesn’t break any new ground. It’s good, but it’s not quite bleathtaking.

Performance

Here’s where things get interesting. The Dead Rabbit 3 boasts an upgraded airflow system, and I’ve got to admit—it’s as smooth as a freshly trimmed beard. The adjustable airflow ring lets you go from a wide-open DTL (direct-to-lung) hit to a more restricted draw for those who prefer a bit of MTL (mouth-to-lung) action.

The postless build deck is spacious and user-friendly, making coil installation easy—even for newer builders. I tried both single and dual coil setups, and while both worked well, dual coil builds definitely brought out the best in this tank. The creative coil placement options are a nice touch, though I wouldn’t call them revolutionary.

Flavor and Vapor Production

Here’s the part where the Dead Rabbit 3 RTA redeems itself: the flavour. It delivers rich, layered flavours that feel like a full-on stampede on your taste buds. Paired with the right e-liquid, it’s like unleashing a flavour explosion.

Cloud chasers, you’re covered too—this thing can chuck some serious vapour. Whether you’re into fluffy clouds or precise flavour, the Dead Rabbit does a decent job of balancing the two. It’s not a top-tier cloud machine, but it holds its own.

Leakage and Maintenance

No one likes a leaky tank, and luckily, the Dead Rabbit 3 RTA handles itself well here. The top-fill design and solid seals mean you can carry this around without worrying about a soggy mod. Maintenance is also simple—disassembly is quick, and the parts are easy to clean.

That said, I did notice some condensation build-up under the airflow ring after extended use. Nothing too bad, but worth keeping an eye on.

Pros and Cons

Pros:

  • Durable and well-built design.
  • Excellent flavour delivery.
  • Smooth, adjustable airflow for DTL and MTL.
  • Spacious, easy-to-build deck.
  • Minimal leakage.

Cons:

  • Condensation build-up under airflow.
  • Not groundbreaking—more “good” than “innovative.”
  • Slightly muted cloud production for cloud chasers.

Final Thoughts

The Dead Rabbit 3 RTA is a solid contender in the RTA market, but it’s not without its flaws. While the flavour is fantastic and the build deck is friendly, it doesn’t do much to stand out from the crowd. It’s a dependable tank that performs well but lacks the wow factor to make it the G.O.A.T.

For me, it’s a 6.5/10. It’s a decent option for vapers who value flavour over clouds, but if you’re looking for something truly groundbreaking, this might not be the one to jump on.

That’s all for now—stay tuned for more goat-level insights in the next review! Until then, keep your builds tight and your flavour flowing. 🐐

Hellvape Hellbeast RDA: A Flavorful Powerhouse with Endless Versatility

 The Hellvape Hellbeast RDA is a standout in the world of rebuildable dripping atomizers, offering a unique combination of style, versatility, and exceptional flavor. As an avid vaper who appreciates the finer details of design and performance, I have thoroughly enjoyed my experience with the matt black variant adorned with the silver demon skull logo. Paired with my Dovpo MVV featuring the White Devil design, the Hellbeast RDA completes a striking setup that demands attention.


Appearance:

The matt black finish of the Hellbeast RDA, coupled with the intricately designed silver demon skull logo, creates an alluring visual contrast that adds an edgy touch to any mod it graces. While personal preferences vary, the amalgamation of these elements makes for a compelling aesthetic, especially when complemented by the White Devil design on the Dovpo MVV. The combination is eye-catching and satisfyingly cohesive.

Performance and Flavor:

One of the standout features of the Hellbeast RDA is its remarkable flavor production. When it comes to mixing and sampling e-liquids, this RDA proves to be the quintessential companion. The flavor nuances are vividly portrayed, offering a depth and richness that other atomizers may struggle to replicate. This makes it an essential tool for those who enjoy exploring the subtleties of different e-liquid profiles.

Airflow Versatility:

The Hellbeast RDA’s airflow system is a marvel of engineering, boasting an astonishing 72 air holes that grant an unparalleled level of customization. This impressive array of options allows for fine-tuning your vaping experience to perfection. Personally, I find satisfaction in configuring the airflow so that the top row remains mostly closed, save for two holes. This setup provides a balance of restricted draw and ample vapor production, enhancing the overall enjoyment of each vape.

Build-Friendly Deck:

The ease of building on the Hellbeast RDA is a highlight that should not be underestimated. The deck’s design caters to both novices and experienced builders, accommodating a variety of coil types and configurations. The Ni80 Quad-core Fused Clapton coils I employed, with their legs cut to 5mm, fitted seamlessly into the deck without the need for excessive bending or adjustments. It’s a welcoming feature, especially when experimenting with various coil styles.

Wicking and Drip Tip:

For wicking, Cotton Bacon Prime proved to be a wise choice, contributing to consistent and reliable wicking performance. The included drip tip may not align with everyone’s preferences, but thankfully, the Hellbeast RDA’s compatibility with various drip tip styles allows for easy customization. Swapping out the drip tip is a small adjustment that can significantly enhance the overall comfort and aesthetics of the setup.

Conclusion:

The Hellvape Hellbeast RDA is a true gem, offering an enticing blend of style and performance that caters to the needs of both flavor chasers and cloud enthusiasts. Its appearance, versatile airflow, user-friendly deck, and exceptional flavor production make it a coveted addition to any vaper’s collection. While it’s unfortunate that Hellvape has discontinued production of this masterpiece, I consider myself fortunate to have secured one in my preferred color scheme. For those lucky enough to come across this RDA, it’s a testament to the innovative spirit of vaping technology.

Build Instructions (using Hellvape Ni80 Quad-core Fused Clapton coils):

Begin by disassembling the Hellbeast RDA and ensuring the deck is clean.
Trim the legs of the coils to approximately 5mm each.
Insert the coils into the designated slots on the deck.


Secure the coils by tightening the screws, ensuring they are aligned and positioned evenly above the airflow holes.
Use a coiling rod or jig to adjust the coil spacing and alignment if necessary.


Pulse-fire the coils at low wattage to eliminate hotspots, gently strumming the coils with ceramic tweezers if needed.
Once the coils are glowing evenly from the inside out, let them cool.
Insert a strip of Cotton Bacon Prime through each coil, ensuring it provides snug contact but is not overly tight.


Comb out and trim the cotton ends so that they rest just above the juice well.


Gently tuck the cotton ends into the juice well, fluffing them slightly to optimize wicking.


Prime the coils with e-liquid and enjoy a satisfying vaping experience.


Reassemble the RDA and adjust the airflow settings to your preference.

Remember, building on an RDA requires attention to detail and safety precautions, particularly when handling coils and using high-powered devices. Always exercise caution and adhere to manufacturer guidelines for optimal results.


Punkapes Personal Air Filter


I came across the Punkapes Personal Air Filter while browsing a shop recently. Given my frequent travels, I thought this device might be a game-changer for those moments when I need a stealthy vape in airports or hotels where vaping isn’t allowed. So, I pulled out my bank card and paid what seemed like a reasonable amount for what the sales guy claimed to be an amazing product.

First Impressions
Opening the box right there in the shop, I noticed the unit I bought didn’t have a filter installed. The sales guy quickly swapped it with another device that had the filter, and we were off to a great start.


What’s in the Box

Features:

  • Durable plastic shell designed for travel
  • Silicone mouthpiece for comfortable use
  • Replaceable carbon air filter
  • Long lifespan: up to 500+ uses
  • Soft touch matte exterior for a sleek look
  • Improved airflow for better performance
  • Designed for continuous use
  • Includes preinstalled filter cartridge

Physical Parameters:

Size: 49mm*90mm
Weight: 159g


The device looks like a mini garbage can with the PunkApes logo printed on it. It has a nice weight and the aluminum body feels good in the hand. The mouthpiece covers your mouth well, but my thick beard caused some issues.

Putting It to the Test

I took a big drag on my vape, put the air filter over my mouth, and exhaled. The cloud billowed out the sides of the mouthpiece. It felt like blowing into a balloon or taking a breathalyzer test. Trying again with a smaller drag and exhaling slowly while squeezing the device into my face, I managed to keep the cloud in the device. Or so I thought. As I moved it away, a large cloud escaped. I gave up and decided to try again later, wondering if it was designed for smaller devices.

After some contemplation, I gave it another go. Taking a big drag and pushing the device into my face, I exhaled slowly. A small amount of vapor escaped, but not enough to be noticed by onlookers—a theory I later confirmed. Holding the device in place for a few more seconds, no cloud appeared when I pulled it away. Success! I repeated the process several times with consistent results. I even managed to prevent any vapor from escaping from my mouth or nose after a few tries.

Verdict

Would I recommend the Punkapes Personal Air Filter? Yes and No.

Pros:

  • Handy for stealth vaping in places like Ethiopia and Uganda where vaping is banned.
  • Useful in airports, Ubers, or taxis.
  • Effective after some practice in preventing vapor escape.

Cons:

  • Potentially allows kids to hide their vape clouds in inappropriate places.
  • Not necessary for most vapers.
For me, as a frequent traveler, it’s a useful addition to my vaping arsenal. It’s not perfect, but it gets the job done in certain situations. If you find yourself needing stealthy vape solutions, the Punkapes Personal Air Filter might be worth considering.

Vaporesso Xros 4 Mini (Camo Silver) – A Stealth Vaper’s Companion!

 Hey everyone,

Continuing my journey with the Vaporesso Xros series, today I’m diving into the Xros 4 Mini, specifically in the sleek Camo Silver finish. Having extensively used the Xros 3 Mini, which I loved for its quiet and efficient performance, I was keen to see how the Xros 4 Mini stacks up, especially with its promise of enhanced stealth and convenience. So, let’s explore the details and see how it compares to its predecessor!


First Impressions: Unboxing the Xros 4 Mini

Design and Build


Xros 4 Mini: The Camo Silver finish adds a unique touch, making the device look stealthy and rugged. It’s slightly longer than the Xros 3 Mini, especially when using the 3ml pod, but it maintains a compact and portable design. The camouflage pattern doesn’t necessarily make it blend in with surroundings, but it definitely gives it a stealthy vibe that appeals to my sense of covert vaping.
Xros 3 Mini: The design was more minimalist with solid colors, which I liked for its clean and sleek appearance. It was slightly shorter and very pocket-friendly.
LED Placement

  • Xros 4 Mini: The LED indicator is now placed conveniently on the side, making it easier to cover with your thumb during stealth vaping. This is a subtle yet significant improvement for those moments when you don’t want to draw attention.
  • Xros 3 Mini: The LED was at the bottom, which was more exposed and harder to conceal when vaping discreetly.

Performance: How Do They Compare?

Battery Life and Charging


  • Xros 4 Mini: Both devices have a 1000mAh battery, but the Xros 4 Mini charges faster thanks to an optimized Type-C charging system. You can get a full charge in just under 45 minutes, which is fantastic for those who are always on the go.
  • Xros 3 Mini: Also has a 1000mAh battery, providing a decent battery life for a day of moderate use. However, it took a bit longer to charge compared to the Xros 4 Mini.

Pod and Coil System


  • Xros 4 Mini: Uses the same pods as the Xros 3 Mini, which are known for their reliability and flavor delivery. The pod fit has been improved slightly for a more secure connection, reducing the chances of leakage. I haven’t experienced any leaks yet, but I’m curious to see how it holds up over time.
  • Xros 3 Mini: The pods never leaked for me, though I did hear some users experienced minor leaks. The pod fit was good, but not as snug as with the Xros 4 Mini.

Airflow Control


  • Xros 4 Mini: Introduces an adjustable airflow mechanism, allowing for a customized vaping experience. The more you open the airflow, the louder the vape becomes. When fully closed, it’s almost as quiet as the Xros 3 Mini.
  • Xros 3 Mini: Lacked adjustable airflow, offering a fixed draw that was comfortable but didn’t allow for much customization.

Flavor and Vapor Production


  • Xros 4 Mini: Delivers a slightly more intense flavor and smoother vapor, thanks to the improved coil technology and airflow control. You can adjust the airflow for a tighter MTL (mouth-to-lung) draw or a looser DTL (direct-to-lung) draw, providing a versatile vaping experience.
  • Xros 3 Mini: While still delivering good flavor, it didn’t offer the same level of customization. The fixed airflow limited its versatility compared to the Xros 4 Mini.

Sound and Stealth Vaping


  • Xros 4 Mini: The sound level varies with airflow adjustment. Fully open, it’s louder, but when the airflow is closed, it’s almost as quiet as the Xros 3 Mini, making it a great option for stealth vaping.
  • Xros 3 Mini: The clear winner in terms of sound. It’s very quiet, not completely silent, but quiet enough for discreet vaping in public spaces.

Usability: Day-to-Day Experience

Stealth Vaping

  • Xros 4 Mini: The Camo Silver design doesn’t necessarily help it blend into the background, but it gives the device a stealthy, rugged feel that I enjoy. The LED placement and adjustable airflow also contribute to a more discreet vaping experience.
  • Xros 3 Mini: While it didn’t have the same stealthy appearance, its compact size and quiet operation made it a solid choice for discreet vaping.

Ease of Use


  • Xros 4 Mini: The buttonless, draw-activated design is incredibly user-friendly. The improved pod fit and adjustable airflow make it easy to use and customize, reducing the chance of leaks and ensuring a smooth draw.
  • Xros 3 Mini: Also very easy to use with a buttonless design. However, the lack of airflow control meant less customization and flexibility.

Durability


  • Xros 4 Mini: Feels robust and well-built, with a design that seems capable of handling daily wear and tear. The Camo Silver finish looks like it can withstand a few knocks without showing much damage.
  • Xros 3 Mini: Durable and solid, though the finish was more prone to showing scratches and wear over time.

Final Thoughts: Is the Xros 4 Mini Worth It?

If you’re already using a Xros 3 Mini and wondering whether to upgrade, here’s a quick comparison:

  • Stealth Vaping: The Xros 4 Mini excels with its Camo Silver finish, improved LED placement, and adjustable airflow that can be quiet enough for stealthy situations.
  • Performance: The Xros 4 Mini offers slightly better flavor, faster charging, and more precise airflow control, making it a more versatile device.
  • Ease of Use: Both are easy to use, but the Xros 4 Mini’s improved pod fit and customization options give it an edge.


In conclusion, the Vaporesso Xros 4 Mini is a fantastic device that builds on the strengths of the Xros 3 Mini while adding valuable improvements. Whether you’re a stealth vaper or simply looking for a reliable, high-quality vape, the Xros 4 Mini is definitely worth considering.

Happy vaping!


RipSaw RDA by Bearded Viking Customs and Suicide Mods

 First Impressions

Before diving into the nitty-gritty of my experience with the RipSaw RDA, let’s clear up a few things. This review is based on a well-used, second-hand unit I acquired, and I’m not getting any kickbacks for this write-up. I’ve only been using it for about a day, so these are my initial thoughts.


First up, the box. It’s much smaller than I expected, which threw me off a bit. Most of my other RDAs and tanks come in packaging that looks like it could house a small electronics lab. The design on the box, however, is killer—skulls and all. I dig that. The cheeky “Made in Hell” on the back of the box? Nice touch. But when I slid it open, I was greeted by a massive 28mm shiny RDA and a bag of spare parts. Missing were the Allen key, user manual, and warranty card, but hey, this is a pre-loved piece, so who knows where those wandered off to.


The smell of Grape Bubblegum hit me right out of the box, making it clear this thing hadn’t seen a good cleaning in a while. I was planning to clean it anyway, but this confirmed it needed some TLC.

Tech Specs and Build Deck

Technical Specifications:

  • Diameter: 28mm
  • Height: Approximately 34mm (including drip tip)
  • Deck: Dual post build deck
  • Airflow: Top adjustable airflow
  • Material: Stainless Steel
  • Compatibility: Suitable for both single and dual coil configurations
  • Build Deck: The RipSaw’s build deck is a dream for those who love ample space to work with. It’s massive, making coil installation a breeze, especially if you’re into big builds. The dual post design is straightforward and accommodates larger coils without a hassle.


Airflow: The top airflow is adjustable, designed to minimize leaks while maximizing flavor and cloud production. It features a multi-hole design that can be fine-tuned to your preferred draw resistance.

Setup and First Hits


After a thorough cleaning and a bit of polishing to bring back its shine, I found some Alien coils I made a while back. I cut the coil legs at 4mm, which I quickly realized was a mistake. This build deck is so spacious it practically begs for larger coils. My 3 core 5 wrap coils felt a bit dwarfed, but with some finessing, I got them installed and looking decent. A slightly longer leg length would have made the installation smoother.


Wicking this behemoth is almost too easy. I used One Cloud cotton for the job. My coils read at 0.09 ohms, so I set my mod to 80 watts and loaded up some juice. With everything set, it was time to put the RipSaw to the test.


Performance


With the top airflow wide open, the RipSaw delivered a nice airy draw with impressive flavor and thick clouds. The flavor is solid but not quite the best I’ve had—my Hellbeast still has the upper hand in that department. I adjusted the airflow to only three holes, which restricted the draw a bit more and resulted in a warmer, more satisfying vape. I personally enjoy a slightly more restricted vape, so this hit the sweet spot for me.

However, my mod threw a tantrum and gave me an atomizer error, likely due to the low resistance. So, I switched to my trusty Dovpo MVV. After a bit of guesstimation on the power setting, I took a massive hit—and promptly got a mouthful of burnt cotton. I quickly rewicked and adjusted the power, and I was back in business.

This RDA is a beast. It’s perfect for cloud chasers who love big, airy draws. I’m seriously impressed and can see myself using it often, though it does make me wish I had a bigger mod for it to sit on. Even my MVV feels a tad undersized for this beast.

Final Thoughts

The RipSaw is a cloud-chucker’s dream. It’s got a solid build, spacious deck, and delivers great performance. Just be prepared for it to guzzle juice like a dehydrated camel. It’s not the most economical option, but if you’re after those thick, satisfying clouds, it’s a worthy investment.

Pros:

  • Spacious build deck
  • Great airflow control
  • Solid construction
  • Excellent for cloud production

Cons:

  • Requires frequent refilling due to high juice consumption
  • Might be too large for some mods
  • Initial setup can be tricky with smaller coils
Would I recommend it? Absolutely, especially if you’re into big builds and massive clouds. Just be ready for it to go through juice quickly and make sure you have a mod that can handle its size. Now, time to vape on and see what other adventures the RipSaw can take me on.


Wednesday, January 22, 2025

Two Part review of the XTAR VX4 Charger

Initial Impressions of the XTAR VX4 Charger 


Alright, guys, it’s time to dive into my initial thoughts on the XTAR VX4 charger.
Now, I gotta be real with you—the packaging is a bit basic, which at first made it feel kinda cheap. But hold up, once I took everything out of the box and plastic bags, my opinion changed. The build quality of this charger is actually pretty impressive.


In the box, you’ll find the charger, a type C to type C cable, a power brick, and a user manual. The manual is helpful but, as expected, the Chinese-to-English translation is pretty rough. But hey, we’ve all been there with products made in China, right?

The charger itself? Solid build, good weight, and feels really well made. Using the XTAR VX4 is a breeze. Pop in your batteries, and it does the rest. It automatically identifies the battery type and starts the charging process. If you need to manually switch between Li-ion and LiFePo4, just press the C/V button.

The MODE button is where the magic happens—you can see the battery’s current capacity or how much juice the charger is pumping in. It also displays the charging voltage.

Now, I still need to test the capacity measuring function, but it seems straightforward enough. More details on that will come in a future review.

In the next part of the review, I’ll be testing it with new and old batteries, and I’ll also race it against two other chargers to see how quickly it charges my batteries. Stay tuned for that, folks!

XTAR VX4 Charger Final Review


Alright, fam, it’s time to wrap up my thoughts on the XTAR VX4 charger. I put this bad boy up against my LiitoKala Lii-PD4 and my old 2-port Golisi charger. Let’s break it down.

Charging Performance:
The VX4 and the Lii-PD4 were neck and neck, both clocking in around 3 hours to charge my drained 18650s from 10% (based on my Vaporesso Target 200). The Golisi, though, took its sweet time, coming in at about 3 and a half hours. So if you’re after speed, the VX4 holds its own.

Build Quality:
When I first unboxed the VX4, the packaging was pretty basic, making it feel a bit cheap. But once you get the charger out, it’s a different story. This thing is solid, with a nice heft to it. The springs are soft, and I mean that in a good way. They hold the batteries firmly without trying to snap your finger off or launch your batteries across the room. After dealing with the Lii-PD4’s aggressive springs, this is a game-changer. Plus, softer springs mean less wear on your batteries. I’ve seen dents on batteries from the Lii-PD4 over time, but so far, the VX4 is treating them nicely.

Features and User Interface:
The XTAR VX4 is a jack-of-all-trades, supporting Li-ion, NiMH, LiFePO₄, and 1.5V Li-ion batteries. Not only can it charge these types, but it can also test their capacity. The charger has four slots, three buttons, and a large, clear display. Ventilation slots on the sides and bottom help keep things cool.

The battery contacts have small nipples on both sides to ensure good contact, even with different battery sizes. Flat-top batteries with a protruding wrapper might be a bit tricky with the positive terminal, and thin batteries like AAAs need to be seated carefully.

The slots run smoothly, so you can easily insert batteries with one hand. They support a wide range of battery sizes, from 29.0 to 80.5mm in length and up to 33mm in diameter. You can charge four 21700 batteries or two 26650 batteries alongside narrower batteries at the same time.

One downside is the plastic feet, which make the charger slip easily on a table. Rubber feet would’ve been a nice touch. The dimensions (171 × 129 × 41 mm) and weight (313 g) make the VX4 more suited for home use rather than travel.

Display and Controls:
The 95mm diagonal display is bright and clear, even in sunlight. The brightness dims after a minute but can be turned off completely. It shows battery type, voltage, real-time charge/discharge current, and charging progress. There are three buttons below the display: “C/V”, “MODE”, and “mWh/mAh”.

C/V: Select maximum charging current (250, 500, 1000, 2000, 3000 mA) and switch between normal and LiFePO₄ modes.
MODE: Switch between showing real-time charging current and charged capacity, and toggle between charging and capacity test modes.
mWh/mAh: Switch between mWh and mAh (only for 1.5V Li-ion) and turn off the backlight.
Capacity-Testing Function:
This is where the VX4 shines. The capacity test charges the battery, discharges it to measure capacity, and then charges it again. The discharge current is fixed at around 300mA, so it takes time, especially for larger batteries. This feature is fantastic for checking the health of your batteries.

Performance Comparison:
The VX4’s softer springs were a highlight for me. They hold the batteries securely without being overly aggressive, which is a nice change from the Lii-PD4’s finger-snapping tension. Plus, they cause less wear on the batteries over time.

One feature the Lii-PD4 has that the VX4 lacks is the auto screen-off function. The VX4’s screen stays on, which might be annoying in a dark room or hotel. But hey, that’s where my trusty Golisi comes in handy. It’s compact, durable, and perfect for travel. The VX4 is definitely more suited for home use.

Conclusion:
The XTAR VX4 is a solid, reliable charger packed with features. It was sponsored by XTAR for this review, but you know me, I call a spade a spade. If there’s anything I don’t like, I’ll point it out. This way, you guys know what you’re getting, and manufacturers know what to improve.

For a versatile charger that can handle multiple battery types and test their capacity, the VX4 is a great choice. It’s perfect for home use and offers a smooth user experience with its clear display and easy-to-use controls.

Apology for Photos:
Sorry for the lack of photos, folks. I took some shots, but they didn’t come out great. It’s winter here in South Africa, and by the time I get home from work, the sun is already down. The lighting isn’t great, and my phone’s flash doesn’t do a shiny black box any favours. Plus, I don’t have professional photography equipment. Thanks for understanding!

Stay tuned for more reviews, and as always, keep on vaping!


YachtVape Eclipse RTA – The Apex of Single-Coil Flavour


First off, a shoutout to SessionDrummer for his fantastic review of the YachtVape Eclipse RTA back in 2022—he really nailed it. But just because it’s not a brand-new RTA doesn’t mean it’s any less of a flavour bomb. In fact, this tank has been my go-to for a long time now. As some of you might know from The Tales of Old Goat and Wanderlust Fogmaster and The Quest for the Eclipse, I’m absolutely obsessed with this RTA. Right now, I’m running two of them daily, and I don’t see that changing anytime soon.


Key Features


  •  24mm diameter
  •  2ml capacity (straight glass) / 3.5ml (bubble glass)
  •  Recurve-style build deck – designed for smooth, honeycomb airflow
  •  Drip Tip: 810 wide bore
  •  Airflow: Honeycomb side airflow
  •  Material: Stainless steel & glass
  •  Colour options: Stainless Steel, Matte Black, Gunmetal, Matte Stainless Steel, Gold, Rainbow
  •  Hidden Horizontal Hexagon Socket Screws – super easy to screw in
  •  4-slot postless deck – perfect for clockwise and counter clockwise coils
  •  Short wicking tunnel – fast juice feeding
  •  Deep honeycomb intake structure – amazing flavour


Performance & Build Deck


The Eclipse was designed to be a stealthy RTA with great flavour, and let me tell you—it delivers. I’m not running a regular build here; I’m running a custom 0.11-ohm single-coil build that feeds off power and gives me that dense, rich flavour I crave. While most people are happy with a higher resistance, I’m all about pushing this RTA to the max.


The build deck is a dream to work with. Thanks to the Recurve-style postless deck, you can easily drop in your clockwise or counterclockwise coils without any hassle. The 4-slot postless deck makes it a breeze to build, and there’s no need to worry about adjusting the coils. This design prevents the coils from losing shape and reduces spitback—something that’s super important for an enjoyable vape.


The honeycomb airflow hits all the right spots. The super deep honeycomb intake structure ensures that you get a smooth, consistent draw with fantastic flavour. Every puff is full of rich, vibrant taste, and that’s something I’m always looking for in a good RTA.


Post Screws & Wicking Tunnel


There’s one caveat—the post screws. The Eclipse uses hex screws that require an Allen key, but here’s the catch: the included Allen key isn’t the right size. Over time, I’ve also noticed that the screws wear out, which causes the Allen key to slip. I’ve replaced a few of these screws and am running low on backups, which is something to keep in mind for the long term.

On a more positive note, the short wicking tunnel is a big win. It ensures fast juice feeding to the coil, which means no dry hits and a consistently satisfying vape. This also helps with the overall flavour intensity, making the Eclipse a top contender for flavour chasers.


Capacity & Refilling


With the straight glass installed, the Eclipse holds 2ml of liquid, which is fine for a stealthy tank like this, but I tend to prefer the bubble glass for a little extra capacity at 3.5ml. The tank’s compact design means I’m refilling it more often, but the quarter-turn top fill makes it quick and painless.


Drip Tip – Surprisingly Comfortable


When I first received the Eclipse, I wasn’t sold on the 810 drip tip that came with it. It’s got a flared shape that initially seemed odd, but after using it for a while, I’ve come to love it. It fits perfectly, and it provides a smooth draw that’s comfortable and satisfying. I initially swapped it for a standard straight 810, but I eventually went back to the included drip tip and haven’t looked back.


Final Thoughts – Still a GOAT-Worthy RTA


The YachtVape Eclipse RTA is the ultimate single-coil flavour banger. It’s small, stealthy, and the flavour production is incredible. While it may not hold a ton of liquid with the straight glass, it’s a small price to pay for the performance it delivers. If you’re looking for flavour on point, a smooth build process, and easy airflow adjustment, the Eclipse is for you.


Pros:

  • Amazing flavour—one of the best single-coil RTAs out there
  • Easy build deck—works for both clockwise & counter clockwise coils
  • Smooth honeycomb airflow—perfect balance of restriction & openness
  • Compact & stealthy—perfect for a smaller setup
  • Comfortable, flared 810 drip tip


Cons:

  • Small juice capacity with straight glass—frequent refills required
  • Bubble glass isn’t for everyone
  • Post screws wear out over time—and the included Allen key is a bit of a let-down


Total Score: 10/10

Would I recommend it? Absolutely. If you’re into single-coil RTAs and want a flavour-focused setup that punches above its weight, the YachtVape Eclipse is one of the best on the market.


But, Mike Vapes and YachtVape, if you’re reading this, how about an updated version sometime soon? The Eclipse has been amazing, but with just a little tweak to those screws, it could be 11/10.

HellVape Trishul V2 Semi-Mech Mod Review

 Some mods are built to be workhorses. Others? They’re made to turn heads. The HellVape Trishul V2 Semi-Mech Mod falls somewhere in between—...